|
|
|
|
SAS Artisan Randy StromsoeLabeling Slides & Photographs by Jeffrey Herman
Getting Slides Developed by Charles Lewton-Brain
Glass Mounts by Charles Lewton-Brain
Permanent Slide Set by Charles Lewton-Brain
Slide Longevity by Charles Lewton-Brain
Handling Slides by Charles Lewton-Brain
Projecting Slides by Charles Lewton-Brain
Digital Work by Charles Lewton-Brain
Photo Tips for Metalsmiths by Cynthia Eid
|
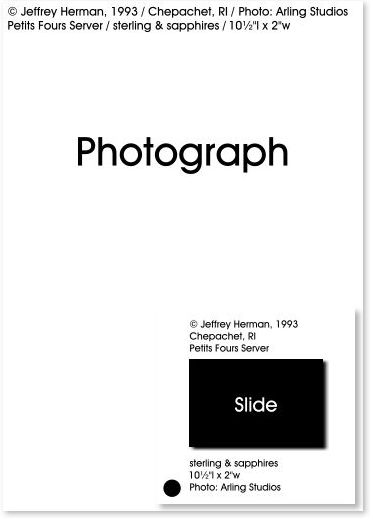
Labeling
Slides & Photographs What information should you include on each slide and photograph? 1. The copyright © sign, 2. your name, 3. the date the object was created, 4. your city, state & country, 5. the name of the individual or company that photographed the piece, 6. the object type (e.g. vase), 7. the object title (e.g. "Blossom"), 8. materials, and, 9. dimensions. It is also important to use the correct medium when labeling. Paper conservation experts recommend a #2 pencil (preferred) and Sanford's® "Sharpie®" ultra fine point permanent marker for photographs with resin-backed paper. Both mediums can be found in most stationery stores. Stay away from water-base and ball point pens—they take longer to dry, may transfer to other materials, and could cause damage to the image. Only a #2 pencil should be used on paper-backed photographs. Always place the photograph on a clean, hard surface before marking. Never use labels, for they may eventually react with the paper and image. And always write information behind the darkest edge of the image, never in the center.
The "Sharpie®" is also recommended for writing on slides with plastic mounts. A #2 pencil (preferred) or high quality ball point pen should be used on cardboard mounts, as thinner inks will bleed. Whenever possible, request plastic as opposed to cardboard mounts from your photo processor. Permanent, pressure-sensitive labels can also be used on plastic and cardboard mounts, but be aware that they may eventually fall off from heat produced by the slide projector. Labels may also emit gasses when kept in protective slide pages, possibly fading the image over time. Whether the image on the slide is horizontal or vertical, always place a dot with an indelible magic marker in the lower left corner. This makes it easier in loading a slide carrousel without having to orient the piece. Photographs should be sent in a cardboard mailer or sandwiched between cardboard and enveloped, with multiple prints separated by tissue or blank paper. For extra protection, slip photographs and slides in polypropylene sheet protectors. The USPS has excellent rigid Priority and Express envelopes—FREE. Be sure to write "PHOTOS—DO NOT BEND" on all mailers and envelopes.
Getting
Slides Developed The other way to guarantee that you'll get good results in the developing of your slides is to connect with somebody who has their own film in the same tank, because then they¹ve got their own stuff on the line. This means finding a local studio photographer who does magazine shots and so on, who does E-6 regularly, and asking if you can pay to have your film developed along with theirs. They have a commitment to their film, and they'll take good care of yours too. Another good source is teaching hospitals, and dental faculties, because medical people like top-quality results, and they do E-6 processing of pathology slides all the time, so if you can connect with a hospital or a teaching faculty, and have your things developed along with them, that's usually a good way to go as well. Then there are the professional labs you can find in the yellow pages of the phone book. Best is to get recommendations from several photographers until you hear the same lab mentioned a couple of times. You will pay a little more but it should be dip-and-dunk processing and should be good quality. That said, I've had scratches and bad chemicals from professional labs as well.
Glass
Mounts A couple of words on glass mounts: if you are like me, when you start taking pictures you don¹t bother with glass mounting them, and after awhile, you end up with thousands of slides, and it's just such a horrendous job to even imagine going and glass mounting them that you don¹t do it. So go one better on me and glass mount them like mad right away when you start producing good slides.
Permanent
Slide Set
Slide
Longevity Collins says Kodachrome has the best longevity, but fades fastest on projection. He also says that Fujichrome has superior stability for projection but only average dye stability and tends to stain formation (yellowish staining which forms with time). Ektachrome tends to stain formation even when stored in the dark (Collins, p 62). One interesting storage alternative available now is to get a very high resolution digitized image made of a slide - then it can¹t change unless you lose your computer storage media and it can be output as a 35 mm slide for projection again at a quality near that of the original. It is quite inexpensive to have your slides scanned to a photo CD.
Handling
Slides I use a laser printer to print slide labels at a very small point size onto peel-and-stick sheet label material, then cut the labels out and stick them on. This is rapid and easy. I have heard of people using those inexpensive peel-and-stick address labels that one often gets coupons for in junk mail. One has the slide label text done instead of an address and then has 250 labels for the same slide. This approach is obviously best if you are doing a lot of the same image.
Storing
Slides
Projecting
Slides Don¹t use cardboard mounts in British slide projectors (they have a stronger spring than North American ones and destroy your slides by slamming them up against the retaining ring, they are built for glass mounts and heavier mounts than are common in North America). Try not to hold a slide on the screen too long (as light kills your slides). Laser pointers are great and can be had for less than $40.00 at this point. Don't overuse them but careful use adds a great deal to a slide presentation. If you ever want to really impress people at large academic conferences take along a small, good pair of opera glasses to look at the details on slides projected at the front of the room; this proves you know what you are doing.
Digital
Work It is possible to scan a fairly flat or low-relief object right on a standard flatbed scanner and, in the case of jewelry at least, get very nice results which can be used to create on-screen slide shows (Lyn Strelau, a Calgary goldsmith, does this to good effect to show his customers his work). Architectural scanners work as well and one can successfully scan surprisingly three-dimensional objects on one. Once the image is digitized it can be manipulated in a program like Photoshop. This has interesting implications for jurying of objects by using slides. There is already a long history of preparing objects just for a photograph or of retouching a photograph to improve an image. I remember a teacher of mine who I questioned about his use of a delicate sandblasted finish on a piece of gold jewelry (which I felt would not last five minutes when worn by a customer). At the time I was shocked when he said It only has to hold up for the photograph. A couple of years ago there were rumors among jewelers doing the large US craft fairs that some people had been juried into shows based on slides of non-existent work, that is, jewelry that was literally glued together for the shot, was made in precious materials but was not actually a functional piece of jewelry except for the purposes of photography. Digitized images are eminently manipulatable. Juries and arts and crafts organizations have not yet faced up to the implications of being able to easily output a slide of an enhanced piece or to repair problems on the slide that the object itself has. There are various standard formats used for digitized images: EPS and TIF are common ones. JPEG is a compression format that is used extensively on the World Wide Web (internet) because image memory requirements can be really tiny and still give an acceptable image on a computer screen (approximately 72 DPI resolution). Try and print it out, however, and you will see what a rough thing a small JPEG image really is. But if you want images on a CD-ROM or on a web site then JPEGs are great. Another interesting thing is that because they are so small it is possible to put some 50 or more onto an ordinary floppy disc that costs fifty cents, and as long as a recipient has an internet browser program, Photoshop or a JPEG viewer, they can see your images. This provides an incredibly inexpensive way of distributing images for people to look at. If you are interested in digital photography talk to your local newspaper photographers (who are going digital faster than anyone else), do research and read magazines for awhile to get a sense of things before leaping into spending money on equipment and software. Small Scale Photography is a 90 page book and 80 minute video combination which is designed to teach beginners how to take quality photos of small objects using inexpensive photoflood lighting and swiveling mirrors (about $70.00 in set up, the camera and tripod of course are more). The focus is on drop-shadow photography and simplicity. The Video lecture teaches the subject well and is backed up and deepened by the book and its clear diagrams.
The Small
Scale Photography
combination retails for $59.95, wholesale is an order of five copies
or more: $35.97 (shipping: 6.00, 16.00 overseas). Brain Press, Box
1624, Ste M, Calgary, Alberta, T2P 2L7, Canada, 403/263-3955, Fax:
403/283-9053,
Back
to Home Page | Society
Info | Artisan
Gallery
| Silver
Events
Updated 3/3/2000 |